Wednesday, October 16, 2013

The real home sweet home mini quilt

J  managed to complete my home sweet home mini quilt a day before going back to my hometown.  Here is my little home sweet home mini quilt.  The idea comes from deliciously tempting colorful donuts.  So I am making the real sweet home mini quilt, with maringue and doughnuts and beautiful vintage lace as my decoraitve details.  Would you like to join me for some doughnuts and tea , everyone ?


0


With 2 love birds (me and hubby) cheering our home ^v^


The letters were outlined using embroidery stitch  ^v^


Welcome to my home, everybody ^v^


Tuesday, October 8, 2013

Home sweet Home mini quilt applique


9/10/2013, 2:33 pm

I am almost getting the mini quilt completed.  In between there are some details that I want to confirm before I stitched them onto my work.  But before that here 's a little preview  ^v^

Today I will proceed with quilting.  Time to concentrate ^^


Thursday, October 3, 2013

A little gift from my husband ^v^

I am madly in love with teacups especially those with vintage and French style designs.  Lately in Kuala Lumpur, a lot of shopping malls are flooding the lifestyle center with beautiful teasets like this.  Gosh !  I am not sure this is a good or bad news for me because I will always end up buying a piece of tea cup before I realize (really !!? )  hehe ….   I know ladies always find good reason to get something they love. 


My husband knows me well, before I knew it, he brought this little gift for me then.  Wow wow wow !  Can’t believe simple pretty thing made me so happy.  This really made my day.  


Also today, the letters are readily iron onto the fabrics with the help of the wonderful freezing paper.  Now I am going to slowly sew it onto the background. 


1.5 hour later ...... my applique letters are beautifully sewn onto the background.  I am still stuck in the design of how I should present it further,  I will call it a day.  Sometimes you just can rush too much when making quilt project because one little mistake will make you very 'uncomfortable' with the result  My way is to take it slow and steady ..... ^^


Thursday, September 26, 2013

Home sweet home wall hanging / mini quilt


As always, my projects started from sketching like this, from smaller pieces of paper to bigger and bigger one until finally coming to the real pattern stage. 


This is a Home Sweet Home project for our new home soon.  I am now in the middle of gathering fonts for the applique …. Besides that, I will add little 3 D candies applique for this project.  I am experimenting the technique now … ^V^

Hopefully the project will end up as what I wished for... wish me luck   (^o^)


30/9/2013, sunny day, 5:45 pm

I stuck half way while sketching out the design of this Home Sweet Home mini quilt.  I was struggling to decide on the details I am going to put in for this little quilt.  A little change in decision will make the following design to have a lot to amend.

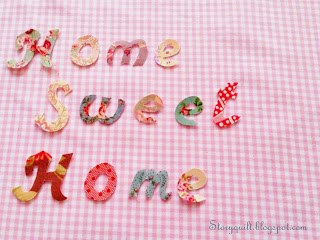
 Finally I decided to choose the fabrics for the words first rather than bothering too much about the layout and detail first.  I know half way through I will surely have something to amend.  My main decision now is what kind of style should I use for my quilt, whether it is chic, country, elegant or Victorian etc.  Taking a look at my renovated new home, I will choose something floral and comfortable design, I like it nature and easy feeling in my living room. 

Few hours to choose fabrics ….. matching ... figuring out , throw out unsuitable ones ….. finally come to decide the fabrics I want for my quilt ^v^


It is a good idea for you to cut out small pieces of fabrics and match it to your background fabric.    Using this way, you won’t waste too much wrongly matched fabric.


Here are my chosen fabrics for my mini quilt today.  I am so excited to sew them to my mini quilt and see the result tomorrow .

(waiting for tomorrow to come **)


Tuesday, September 24, 2013

Zakka style needle book PDF sewing pattern

Here is a little suggestion for you, if you are planning to make a needle book, always think of the size and some compartments or pockets for your sewing items.  

I love Japanese zakka style concept all the time.  So for this needle book, I am going to make something with vintage look yet zakka style.  Apart from serving 1 purpose, I also want my needle book to be a decorative item in my studio.

Here is what I made, Petite Fleur 3 D flower needle book.   Hope you will like it 

Feel free to visit my Etsy shop for the pattern ^v^
It's a way to decorate my little studio and using this way, I don't have to locate my needle book which is hiding in the piling fabrics anymore  ^v^


There are all together 6 pages in the needle book, with 2 pockets at the front and back pages. The pockets can be used to store the scissors and other sewing items, ribbons, buttons etc
Sewing technique required :  ladder stitch (hidden stitch) and hand applique technique


I also love to label the pages because I always messed up my needle type.  So labeling helps me organize my needle easily.  Embroidery needles go to embroidery page, sewing needles go to sewing needle page etc ^u^


Hope you love my idea of needle book and enjoy making one for yourself soon ^^


** * If you would love to purchase the pattern kit, please contact me at storyquilter@gmail.com


Next project, Zakka Style needle book. Will be available in my Etsy shop soon. ^V^

A preview of  my needle book.  My pattern will be available for sell in my Etsy shop tomorrow ^v^

I always mess up my sewing needles, having a needle book come be handy to me to organize my needles perfectly. The needle book follow zakka style yet comes with vintage look.

If you would love to purchase the needle book sewing kit too, please contact me at storyquilter@gmail.com


Thursday, August 29, 2013

Ready to send to Sophia

My pencil case project was finished 4 days ago.  I really love the romantic presentation, little Sue blowing the dandelion seeds in the wind is always one of my favorite them.  

I sew the letter ' Especially for Sophia' at the back in the beginning but found this a bit dull, adding a little fabric stamp will make this present looks more special.  Sending to you, with all my best wishes ^^.

The size  measures 21cm (width) x 12 cm (Height).

 Can't wait to send it out today ^^


If you wish to purchase the pattern, please email me at
Storyquilter@gmail.com 

(^v^)

Tuesday, August 20, 2013

Sunbonnet Sue pencil case for my niece, Sophia, with Love.

I am making this pencil case for my niece, Sophia, in Athens, Greece these few days.  Ever since little Sophia saw my works, she kept asking my sister to request a little gift for her. 

Can't believe that time goes so fast, Sophia is finally going to secondary school soon.  This pencil case is just suitable for her age, cute and soft, just like her charater. 


Appliqued is pretty simple for this project.   With beautiful rainy day today, I am able to complete the applique very fast.  


An idea came into my mind when I saw this little fabric fell onto the choice of my back side fabric.  Hmm.... this would make this pouch looks more unique that way .... 


I am sure Sophia will exclaim a big 'WOW' when she receives this little gift from her aunty. ^V^

It's been quite a day, I guess I am going to call it a stop today.  Simple quilting, simple life .  


me  --->

Monday, August 19, 2013

How to hand stitch round shape applique

Hand stitching a square or straight applique maybe easy for beginner but when come to round shape pattern, some friends found it very difficult.  

I remember I went went through the same problem when I started stitching applique with love shape.  


Hand stitching a square or straight applique maybe easy for beginner but when come to round shape pattern, some friends found it very difficult.  
I remember I went went through the same problem when I started stitching applique with love shape.  

Here is a little tip for you. 

1.  Draw the pattern onto a hard cover paper (you can use tissue box packaging for this purpose, since you will be throwing it away after use).   Draw the pattern onto the fabric as shown.


2.  cut out the fabric along the drawn pattern, allowing approximately 0.7 cm - 1 cm seam allowance.


3.  Sew along the pattern, then sewing area should be slightly away from the drawn line.


4.  Put the paper pattern (front facing downward) according to the drawn pattern on the fabric, then pull the thread until the shape of the pattern appear.  

6.  Iron the pattern to form the shape, after that, take out the paper, pull the thread to form the shape again

7.  Pin the pattern onto your project to be appliqued, sew along until the applique is beautifully stitched onto your project, then cut the thread.

You will surely going to make a neat and beautiful round shape applique without any failure.


***  If you are using freezing paper 


If you prefer to use the freezing paper for hand stitched applique, the step is even easier.

1.  Draw the pattern onto freezing paper

2.  Draw the pattern onto the fabric (pattern should be front facing downward).

3.  cut out the fabric along the drawn pattern, allowing approximately 0.7 cm - 1 cm seam allowance. 

4.  Iron the pattern onto the fabric, the sewing area should be slightly away from the drawn line.  then pull the thread until the shape of the pattern appear.  

5.  Pin the pattern onto your project to be appliqued and sew it onto your project.


So, what are you waiting for, enjoy applique today ^v^


Wednesday, August 14, 2013

Little House on the Hills at 4 Seasons pouch series.


I have not been able to update my latest news for so long.  After moving back to Kuala Lumpur, now i am able to access Facebook and blogspot any time I like without the need to go through any VPN any more, YES !!

Before I started myself to full mode again.  Here is a little pouch I recently made and wished to share with all of you.  This pouch is just too good to carry around, especially if I am going out for leisure outings, without the need to carry so many things at all.      Some friends saw my earlier little house version and immediately requested me to make the little house pouch for them , designs and everything is up to me.  Well, here you are.  I have been keeping my promise well, my dear friends.

My new series, little house on the hills at 4 seasons (  All sold out !  ^v^  Thank you so much for liking my works).   

I also received emails requesting me to make patterns for sell in the future.  Yes, I will, my dear friends.  Before I am all settled down, please give me some time.  You will definitely see my patterns out soon.  In fact, I am working on little SunBonnet Sue pencil case now, pattern will be suitable for beginner level.  ^v^


***

Wednesday, June 5, 2013

Diary of a little cat series is out for sell now.

2013 is really a busy year for me.  There are so many changes in my life.  I recently moved back from Shanghai to Kuala Lumpur.  Though back to our country, we still find it very difficult to adjust.  Not only that, I also went through a minor operation just few weeks ago.  Though the operation was minor one, I still feel the slight pain from time to time.  BUT I still work on things I love the most ... handmade goods ^v^.

Here are my latest series, available for sell in Etsy.  (Please be informed that 2 of them were sold out on the day they were launched ).


Available for sell in Etsy :  ^v^


Please note that the one of the Left and Right were sold out on the day they were launched .  Thank you ^v^


 Please feel free to join my Facebook to see more photos of my works ^v^

https://www.facebook.com/story.quilt.9


Tuesday, February 5, 2013

A Baltimore style wedding ring cushion

This is a special request by my regular customer.  I think this idea is pretty good  for a wedding ring cushion.  It is not only a wedding ring cushion but also a proprietary decorative cushion for the newly wed too.   Maybe you can try making this type of cushion for your family members who is getting married too.  Definitely a very special gift for him & her.  

A whole month project from design to sourcing and to the making of this beautiful cushion.  ^v^

Remember to join my Facebook for more updates and chatting :)

https://www.facebook.com/story.quilt.9


0