Showing posts with label Applique tutorial. Show all posts

Friday, September 28, 2018

Let's sew applique on your bag !


This is my way of sewing appliqué to my bag projects, without the use of freezing paper.  I am demonstrating appliqué sewing using my new Little House Round wallet Sewing Pattern (available now in my Etsy or Craftsy shop).  Hoping it would assist anyone who love appliqué sewing in their future works.  Have fun !  (^o^)v


1. Cut out the appliqué and outline the design as shown in photo below.


You will get the result below.  Sew according to the sequence provided by the sewing pattern.

(Tip : Do not cut out the bag body main fabric at this stage; normally the main fabric will shrink after sewing up the appliqué, I would suggest you to complete sewing up all the appliqués, then use the bag body pattern to re-measure main fabric and cut it at that stage)


2. Sewing the clouds (1) & (2)
Cut out the cloud patterns; transfer cloud (1) to its fabric.
At the same time, draw a ¼” seam allowance (red line). Cut out the cloud based on the seam allowance. 


(Tips :  for any appliqué pattern that is round in shape, always cut the fabric on the bias (photo below))


Note that I also give a little seam allowance (yellow line below) for me to sew Cloud (2) later.


Make small cuts at the curved in area of the cloud (photo below).
Pin cloud (1) onto the outline of main fabric.


  Use the needle to “scrapping” the seam allowance inward according to the outline then press it using your thumb.  Start sewing the cloud onto the main fabric (photo below).  Continue this process to complete the appliqué.

3. Sewing the chimney and trees.
If you have problem sewing mini item like the chimney, you can always embroider it.  Using Step (2), sew the trees onto the main fabrics.


4. To Sew the little house
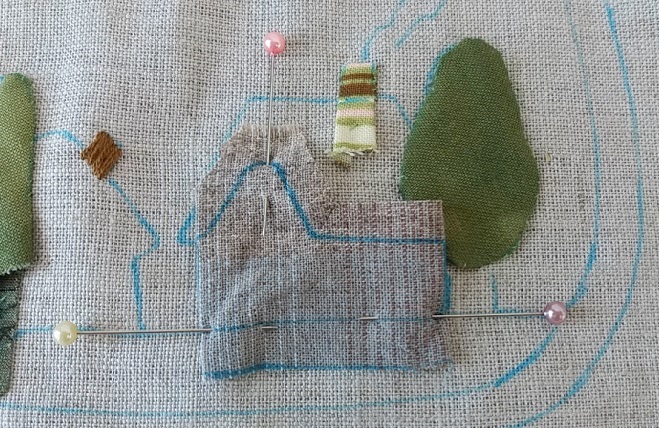
Transfer one of the little houses pattern onto the appliqué fabric, remember to also draw the ¼” seam allowance (it doesn’t need to be perfect, highlighted below)

Using the same house pattern, outline as shown in photo below.

Using the same house pattern, outline as shown in photo below.


Pin and sew the appliqué fabric as shown below.
5. Sewing the roof top, Pattern (10)
Transfer roof top pattern onto its fabric, remember to include the seam allowance.  Cut out the fabric.  Make a few small cuts as highlighted in blue lines below. 
Pin and sew the fabric onto the outlined roof top (photo below).

6. Sewing the land
Transfer the land pattern to the main fabric and the appliqué piece( highlighted in photo below). 


Sew the land to get to the result below.  

Using embroidery thread, sew the smoke using running stitch.  

Re-measure the main fabric with the bag body pattern, cut out the main body fabric. (photo below).


The appliqué session for this sewing pattern is completed. Set aside. You are ready to start the bag making steps next. ^v^

Sunday, January 3, 2016

A nice craft book to introduce to you.

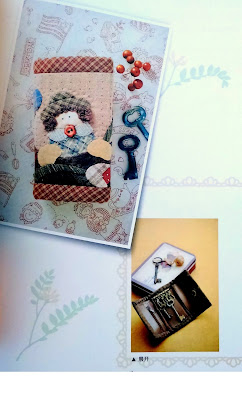
 If you are looking for a good craft book to make some very simple yet cute homespun style projects, maybe this is quite a good to refer to. 

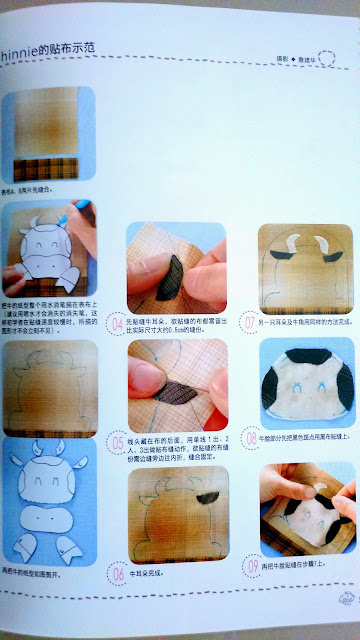
This book is written in Chinese language. I believe if you have knowledge in bag making, you won’t find language is a boundary here.  Every bag pattern has its own template and picture illustrated instruction that is quite easy to follow.

This DIY pattern has a good collection of 34 small projects in picture illustrated step-by-step instructions. Each patterns will have it's own template. I find it quite suitable for handmade crafters at all levels.

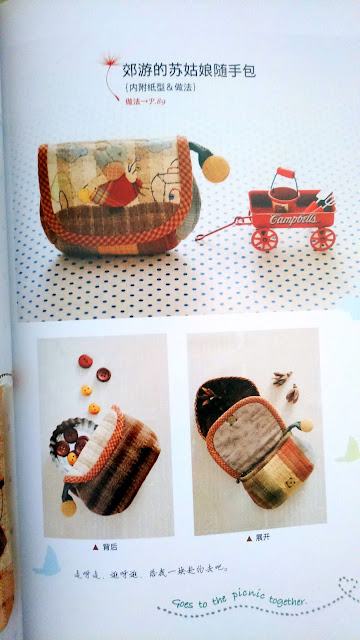
Here are some of the bags and craft projects it covers.  

* pin cushions
* coin purses
* pencil cases or cosmetic pouches
* hand bag
* draw string bag
* purses and clutch purses
* Key holder or key purses
* wall hanging applique


This book is available in my Etsy shop now.  If you are interested, please visit my Etsy shop by clicking the any photos below. 

in fact, I am introducing more useful craft books in my Etsy shop soon. Please feel free to follow me at my Etsy for more updates ^v^


https://www.etsy.com/listing/262437921/patchwork-applique-homespun-quilt-diy?ref=ss_listing


Monday, August 25, 2014

Sunbonnet Sue & Missing chicken handbag

A-ha !!   Found these photos in my hard disk.  This Sunbonnet Sue and missing chicken handbag was actually my old work back in 2011.  Back at that time, I difficulty accessing to blogspot from Shanghai, In the end, I no longer do any blogging.  So since I “meet” these project photos again, I want to share them in my blog.

I like this scene so much, it’s nolstagic and heart warming and I remember that was my second project in machine applique.  Take a look at the expression of little chicken there.  The angle of its eyes was really a hard one and I remembered sweating a little when sewing the eyes ^v^ hahah….. can’t help laughing just to think of that moment.  It was really a big “phew” after completion.

Apart from that the shape of the bag is pretty unique too.  It may look small in the eye but you will be surprise that it can actually put quite a number of goodies (one of my biggest criteria when making bag too).   My only regret here is I never thought of making pattern for this one that time … (~n~).  Any way, it’s just so great to see this bag again.


I always want to add more surprises to my bag projects, see the bag side of the bag, apart from a beautiful quilted pattern, I added a little pretty Lily of the valley applique.  I love this flower so much and went searching for the flower language.  It said Return of happiness, purity of heart, sweetness, tears of the Virgin Mary, you've made my life complete, humility, happiness, love's good fortune. The legend of the lily of the valley is that it sprang from Eve's tears when she was kicked out of the Garden of Eden. It is also believed that this flower protects gardens from evil spirits. Also known as the flower of May.”  What a perfect match of floral language for this bag. So it was added to my bag. 

What is the story of this bag, I will leave it for you to tell ^v^


Friday, August 15, 2014

About Anne Story Quilt original digital pattern file available in my Etsy now ^U^

Hello, everybody

Story Quilt About Anne cute tote bag digital pdf sewing pattern is available in my Etsy shop now.

The digital pattern is in photo illustrated step-by-step instructions.  I will guide you through almost every step, at the same time, I also use a more error proof way to help you through your sewing process. All you need to do is to understand every step and take it to your own pace.  Apart from making a beautiful bag for yourself or your love ones, you will surely enhance your quilted bag making skill from my pattern too.


If you wish to find out more about this pattern, please check out my Etsy shop or by clicking on the photo below.


If you are interested to purchase this pattern, please feel free to email me at 
StoryQuilter@gmail.com

or visit my Etsy shop at the link below. 

https://www.etsy.com/shop/storyquilt

Weekend is coming soon, so any special plan ?  Enjoy your weekend ^v^


Thursday, July 24, 2014

Important tips for making applique bag


You may have bought a lot of Japanese patchwork books and intend to try making the bags just like them.  But when facing the appliques, you give up!  I am sure a lot of you may have such experience.  Well, not too worry, here is some of my tips for making applique on a piece of quilt or for my bag.  Applique is never a quick job, it is a slow work with passion.  So take it slow and absorb every way to stitch, once you learn the technique, you can really stitch your works beautifully and pretty fast :) 

Always make sure your background fabric is larger than the original pattern, normally I will have larger space by an inch or more.  This is because when one is sewing the applique, depends on the person's stitching works (especially beginners), sometimes they may pull it harder or they may use larger stitch to sew, in the end, this may cause the entire piece of work to shrink and become smaller than the original pattern.  When making your own bags, it is important to prevent this from happening because all the measure measurement is fixed and you really need to stick with the measurement, you will end up having a bag that is either mis-shape or smaller.  So leaving extra background fabric will leave you extra space to do possible correction.

Photo below :  I normally leave an inch or more for my background fabric.


Always number your applique 
Take your time to look at the pattern and number them to create sequence for your to stitch (some books may not number the applique).  Start layer-by-layer, the farthest layer should be the one to start first.  This prevents you from making mistakes.  

Number your applique from the farthest layer.  
 

after stitching my first layer (furthest), I will continue on my second layer of my applique.  With this method, you can slowly come to a beautiful applique works, with less mistakes.


When facing smaller applique that you can't sew ? 
You can try using the felt to help you in your works, I would suggest you to use machine to sew in this case.  This surely reduces a lot of difficulty in stitching.


 Choosing the sewing thread that has the same color to your applique
This is applicable to machine or hand stitch applique.  Your works will become very neat for sure ^v^.


Cut out fabric needs to be larger than the pattern

For hand stitch applique, after cutting out the pattern, you will need to draw it onto the fabric, always make sure your fabric is larger than your pattern when you cut it out.  Here is a guideline for you

http://storyquilt.blogspot.com/search/label/How%20to%20applique

You are excuse to miss out applique that is less significant
This is really true. Sometimes a simple tiny thing that is not significant in your project, you can actually omit it.  Or you can always find other solutions to replace that particular applique.  For example a flower applique with complicated petals to sew, you can actually replace with beautiful buttons or small fabric flowers or felt ^v^  (lazy way to make beautiful project)

Do a final check
See if you have missed out anything important.

Practice make perfect
The more you practice, the more you get to know more about applique (you may even find more ways to sew applique).  You will also be so surprised that applique can be so much fun that makes you so addicted to.  Also, when you have complete even a very simple project, you will be amazed by your hand works, the end result will be so unique and full of your own character.


The above are my ways to making applique quilt or bags.  I hope the solutions help you a lot in your future applique works.  So why don't you start a very simple project soon ?   Good luck!

Enjoy !!  ^v^


Wednesday, July 16, 2014

My way of machine applique

I love hand applique when making my projects, it is more lively and present personnel touch with one’s characteristics. However when comes to making very small applique, I still have to choose machine applique.

Here is my way for machine applique. 


I will draw the pattern onto the fusible interface with front side of drawn pattern facing down onto the back for the fusible interface.   If you have many appliques and they are going to be applied on the same piece of fabric, then you can draw many patterns onto the fusible interface (like what i did below).    Then iron the pattern onto the fabric, the fabric needs to be larger than the fusible interface in this case. 


Then cut out the pattern from the fusible interface.

I prefer to choose pattern 05 below as my applique stitches, it is thinner and when I sew, i can move the stitches more freely than any other stitch pattern.  IMPORTANT : You will need to adjust the length and width of the stitches, do some testing on a scrap fabric before you stitch the real applique 


Remember to start a 'back stitch' first, then you can start stitching the edge of the cut out pattern as shown below.  Start slowly, once you pick up the skill, you can really sew the applique like a piece of cake (^0^). Then ends with a back stitch again to 'lock' your thread from coming loose.


See how easy it is done ?  


Here is some of my applique works today.  Doesn't it look nice ?  I am working on a little bag.  You will see it soon .


Monday, August 19, 2013

How to hand stitch round shape applique

Hand stitching a square or straight applique maybe easy for beginner but when come to round shape pattern, some friends found it very difficult.  

I remember I went went through the same problem when I started stitching applique with love shape.  


Hand stitching a square or straight applique maybe easy for beginner but when come to round shape pattern, some friends found it very difficult.  
I remember I went went through the same problem when I started stitching applique with love shape.  

Here is a little tip for you. 

1.  Draw the pattern onto a hard cover paper (you can use tissue box packaging for this purpose, since you will be throwing it away after use).   Draw the pattern onto the fabric as shown.


2.  cut out the fabric along the drawn pattern, allowing approximately 0.7 cm - 1 cm seam allowance.


3.  Sew along the pattern, then sewing area should be slightly away from the drawn line.


4.  Put the paper pattern (front facing downward) according to the drawn pattern on the fabric, then pull the thread until the shape of the pattern appear.  

6.  Iron the pattern to form the shape, after that, take out the paper, pull the thread to form the shape again

7.  Pin the pattern onto your project to be appliqued, sew along until the applique is beautifully stitched onto your project, then cut the thread.

You will surely going to make a neat and beautiful round shape applique without any failure.


***  If you are using freezing paper 


If you prefer to use the freezing paper for hand stitched applique, the step is even easier.

1.  Draw the pattern onto freezing paper

2.  Draw the pattern onto the fabric (pattern should be front facing downward).

3.  cut out the fabric along the drawn pattern, allowing approximately 0.7 cm - 1 cm seam allowance. 

4.  Iron the pattern onto the fabric, the sewing area should be slightly away from the drawn line.  then pull the thread until the shape of the pattern appear.  

5.  Pin the pattern onto your project to be appliqued and sew it onto your project.


So, what are you waiting for, enjoy applique today ^v^


Wednesday, December 24, 2008

Hawaiian quilt

This is my first project for higher level course, Hawaiian quilt. I didn't take down the step for cutting down the fabric but this site has good explanation with photos. http://www.makehawaiianquilts.com/

After that, I need to perform basting to sew put up the pattern which was arranged properly onto the background fabric (as shown in photo) before starting the applique process.

When applique the pattern, first you need to fold the fabric by tracing along the pattern as shown.


then pin it. After that, have patient, slowly perform the applique. One key point is, never cut the fabric if you find that you cannot sew up the shape as you wish eg. the sharp edge, the round edge. There are ways to do it.


HOW TO MAKE THE SHARP EDGE
As usual make a trace line onto fabric as shown,


fold the fabric, this create the edge as shown in circle area


carefully fold the edge into the fabric again, and pin it tightly as shown below.


Sew up (applique method) the edge as shown below


there you go, a sharp edge.