How is your summer going ? It has been a great and wonderful summer for
me this year. My second sister who has
been living in Europe for more than 10 years is now back home for long
holidays.
The idea of Wanderer cross body was Inspired by
my sister who wish to have a small cross body bag that hold small daily
essentials in an organized way. Hence come a small bag with multiple pockets ^v^
This is a fun to sew and functional 2 zippers and multiple pockets cross body bag that is just perfect to store your daily essential. It is perfect for many occasions or seasons, from day-to-day usage, leisure shopping to travelling purpose, a bag for all time and all seasons.
** You can opt to make this bag into a wristlet
clutch or a cross body bag too.
Remember to check it out at my Etsy shop by
clicking any of this photo.
▨ ▨ ▨ FEATURES ▨ ▨ ▨
- Many pockets to organize small daily essentials (cell phone, key, wallet, lip balm, mini parfum, essential oil, access card etc).
- Small, light and roomy pouch - 1 big zipper compartment to carry your daily essentials such as smartphones, lipsticks, lip balm, mini parfum etc in an organized manner.
- 2 small zipper compartments to hold your handy essential like lip balm, mini parfum, access card, phone, compact powder etc)
- 1 zipper compartment at the back of the bag to secure your essentials at the same time allowing easy access to them.
- suitable for any occasion from daily usage to traveling. You can use it as a clutch or wristlet clutch too.
- multiple ways usage, as a shoulder bag, crossbody bag, or fanny pack (waist bag by sliding the slide ring to the end)
- Many pockets to organize small daily essentials (cell phone, key, wallet, lip balm, mini parfum, essential oil, access card etc).
- Small, light and roomy pouch - 1 big zipper compartment to carry your daily essentials such as smartphones, lipsticks, lip balm, mini parfum etc in an organized manner.
- 2 small zipper compartments to hold your handy essential like lip balm, mini parfum, access card, phone, compact powder etc)
- 1 zipper compartment at the back of the bag to secure your essentials at the same time allowing easy access to them.
- suitable for any occasion from daily usage to traveling. You can use it as a clutch or wristlet clutch too.
- multiple ways usage, as a shoulder bag, crossbody bag, or fanny pack (waist bag by sliding the slide ring to the end)


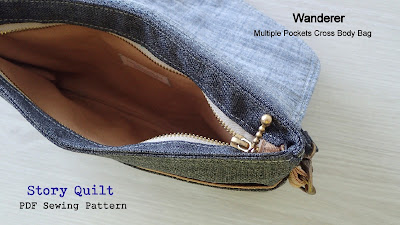


Depends on your choices, you can opt to make this bag as a shoulder bag, cross body bag, or fanny pack (waist bag by sliding the slide ring to the end)


The pattern also include the tutorial to make the cross body strap and an optional downloadable tutorial to make a wristlet for this bag.


Remember to check it out at my Etsy shop. ^v^